| Most companies have the ability for their staff to connect to their network while they are not physically in the office. Usually this is done via a Virtual Private Network (VPN). |  |
To create a VPN connection on Windows XP you will need to do the following :
Open and view your network connections
The first step is to open your network connections and there are several ways of doing this :
Method 1
Locate the network icon in the lower right corner of the screen (System Tray) ![]()
Right click on the icon and go to ‘Open Network Connections’.
Method 2
Go to Start > Run or press ‘Win key + R to open a run dialogue window.
In the run window field type in ‘Control netconnections’.
Method 3
1. Go to Start > Control Panel > network connections (if in classic view)
or
2.Go to Start > Control Panel > Network and Internet Connections > Network Connections (if in category view)
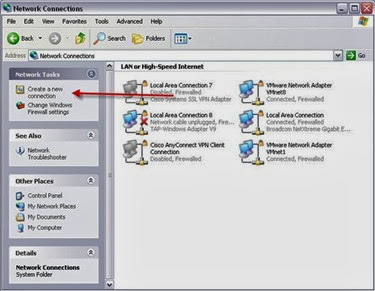
All of the above methods will take you to the following window :
Creating the connection
Click on the ‘Create a new connection’ (See above) and the ‘New connection Wizard’ will be displayed.
Complete as shown
Click Next
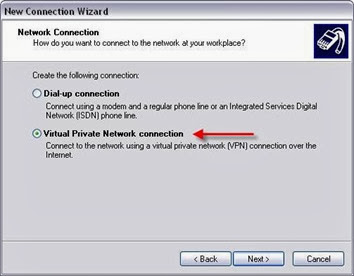
Select ‘Connect to the network at my workplace’.
Select ‘Virtual Private Network connection’ and click Next.
Enter the name for the connection. This doesn’t need to be the server address as this will come on the next page of the wizard.
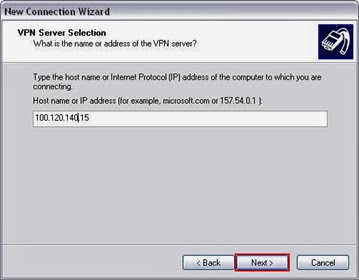
Enter the IP address or server name for your VPN. You will be given this by your network administrator.
Complete as above unless multiple people use your machine and will also use the VPN.
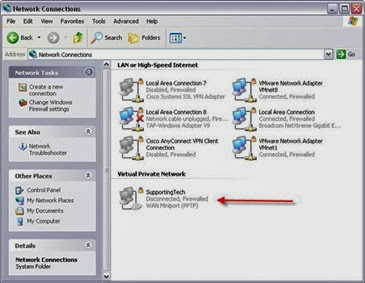
Your VPN connection has now been configured.
Change the gateway setting
By default this connection will route all of your traffic via your VPN. If you want only the traffic required for the VPN to be transmitted over the VPN and all other traffic/connections to be unaffected, you will need to alter a setting on the adapter.
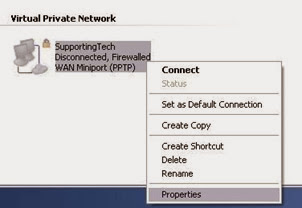
Open your network connections (See method 1,2 or 3 above).
Right click your VPN connection and go to Properties
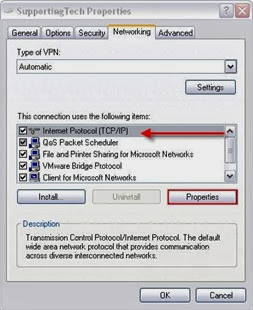
Go to the networking tab
On the networking tab highlight the internet protocol (TCP/IP) and click properties.
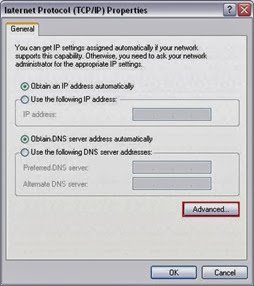
Click advanced on the properties window.
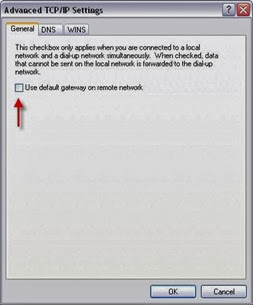
Untick the ‘Use default gateway on remote network’ option on the general tab and click OK.
Connecting the VPN
Open your network connections (See method 1,2 or 3 above).
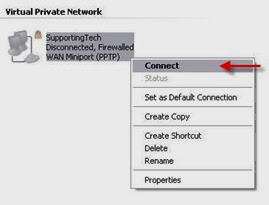
Right click your VPN icon and select ‘Connect’.
This will open a login window.
Enter your username and password and click connect. It will verify your username and password.
A new connection will now show in your system tray.
The network connection in your Network connections window will now show as connected.
Your VPN is now active and ready to use.









No comments:
Post a Comment